
If you are anything like me, the beginning of my period is a time to slow down. For so many years, I tried to push through it, keeping up with my regular schedule, my regular asana practice, just basically ignoring what was going on in my body. The older I get, and after having the kids, it has become increasingly more difficult to just ignore and plug along, as my symptoms have become more intense. Now, it literally forces me to slow down. When I had to change my habits to accommodate my cycle, I did what I always do, I dove into books, and articles, so I could basically validate (sad, I know) listening to what I knew I needed to do for my body. Although I knew that certain asana were contraindicated during menstruation, I didn't really understand why. I knew that vigorous practice, and inversions were not supposed to be practiced. The philosophical reason that I had learned, is that menses is a downward flow of energy, and we dont want to switch that. Flipping upside down is a way to increase our upward flow of energy. While I believe in/resonate with what is happening in our energetic bodies, I also like to learn the physical reasons. If you would like to read a little bit more about these concepts, here are two great articles - The Mindful Menstrual Cycle (written by our beautiful friend Jackie!!), and Menstruation and Yoga. I would also suggest the beautiful book Red Moon, by Miranda Gray (linked at the end of this post).
Below is the actual yoga practice that I did during my last period. This was not shot while I was actually practicing, because my practice is sacred to me. (Side note - your practice is also sacred to me, which is why I NEVER EVER take pictures of students practicing in the studio durning a scheduled class. Your practice is not used a marketing tool. We do however have a new super exciting campaign coming up soon!!)
Without further adieu, below is a simple restorative sequence, designed to help alleviate some of the discomfort that many of us experience. Feel free to set the tone for your practice by using incense or essential oils, selecting calming music ( I have a playlist for the sacral chakra on Spotify, as well as a few other playlists that are slow and relaxing!!) I sometimes prefer to use my phone to set a timer for each pose, and sometimes I prefer to just listen to my body, and move when I am ready.

Our first pose is supported child's pose. In the picture, I am using studio props, quite a lot of the actually, but all of these can be swapped out for items that you have at home. Under my torso, I have a long, round bolster. This can me swapped out for a couple of firm pillows, like throw pillows, or a rolled up blanket. Under my ankles, I have a small rectangular bolster, which could be replaced by a rolled up towel. Lastly, I have a sandbag on my back, which helps to further stimulate my parasympathetic nervous system, which reduces stress and inflammation. You could use a bag of rice here, a folded heavy blanket, or allow your creativity to explore other items that will help to weigh you down!! You can also use a rolled up blanket or a pillow in between your hips and your ankles to help alleviate any tension on the front of your knees that you might be feeling. Once you are set into this pose, you can set a timer for anywhere between 5-15 minutes, or just chill here until you feel like moving into the next pose.

Our second pose is a supported seated forward fold. Here again, I have used a few props to make this extra comforting. The bolster under my knees helps to make the stretch on my hamstrings a little more gentle, and allows the stretch to move more into my low back. The blanket underneath of my legs offers just a little extra cushion and comfort. The sandbag here again helps with the stimulation of the parasympathetic nervous system. The bolster could be replaced with a rolled blanket or towel, and the sandbag, a soft object that has some weight to it! Just like our first pose, feel free to linger here for 5-15 minutes, or as long as your body tells you to.
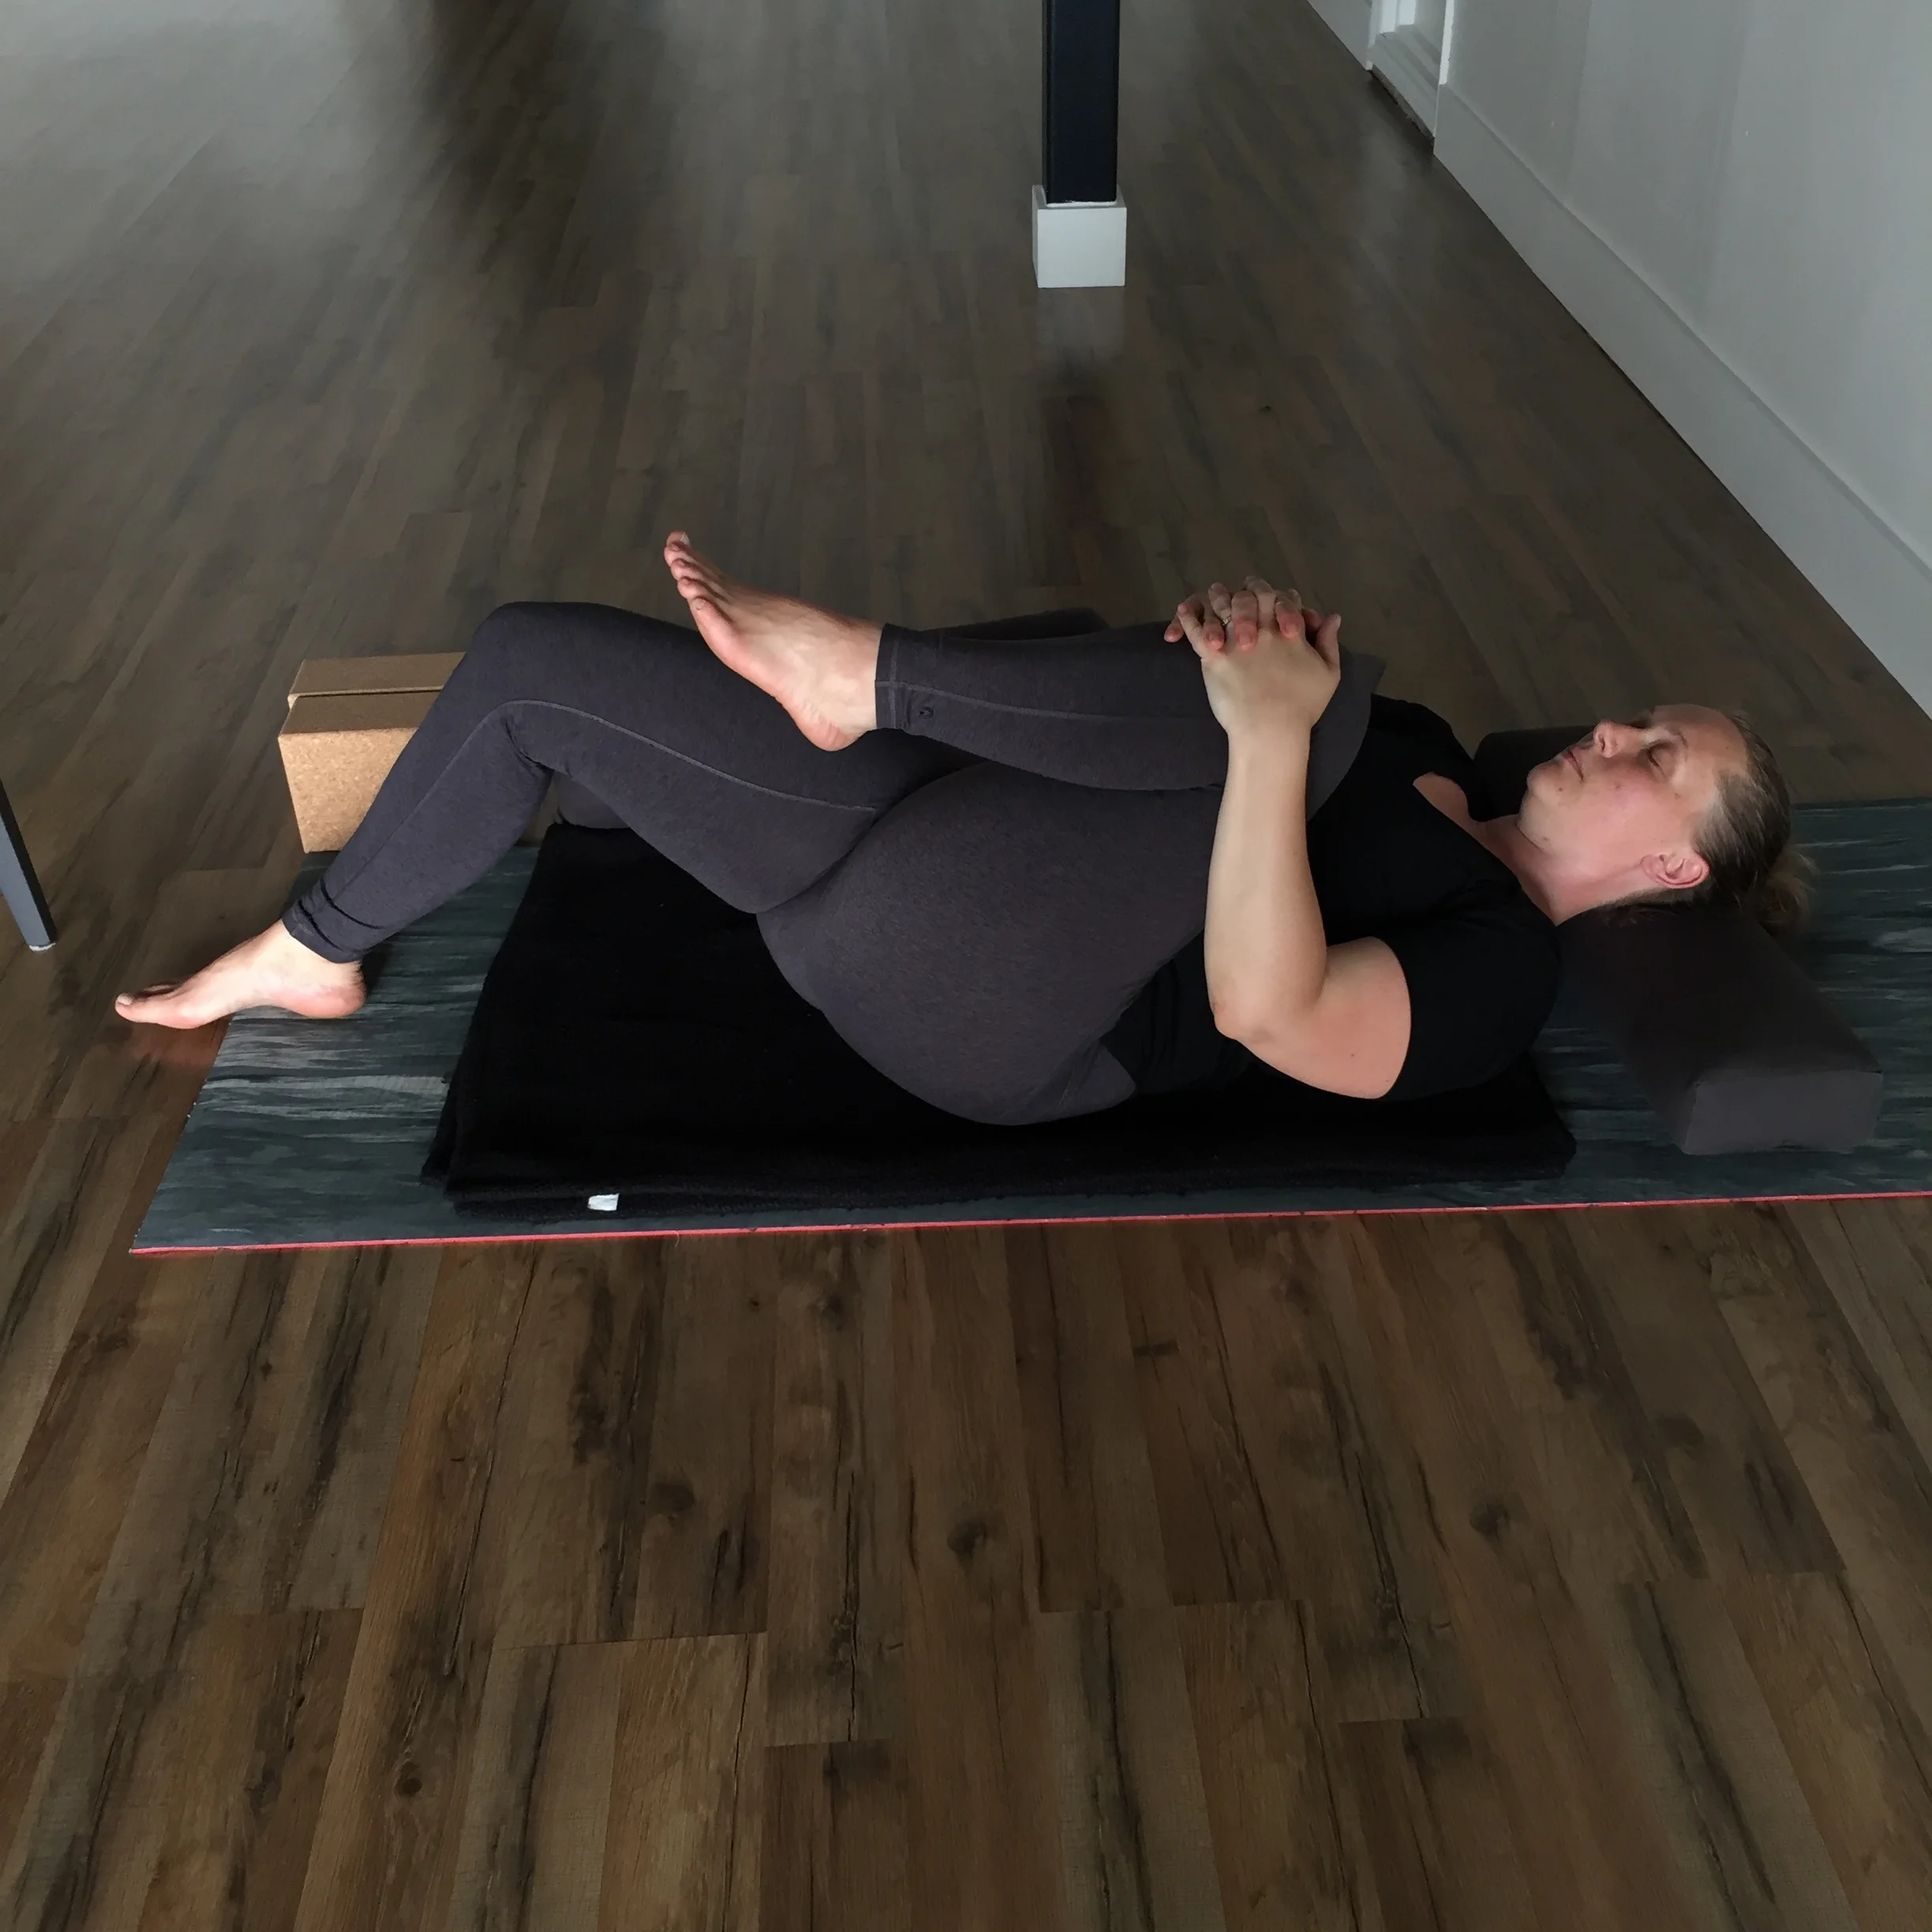
Our third pose is wind relieving pose. This pose can help to reduce bloating, and is a nice gentle stretch for the low back muscles. When doing this pose, the leg that is not being hugged in can either be bent, or straight, depending on what feels comfortable for you. Here I have a small rectangular bolster to support my head and neck, this could be replicated by using a small pillow, or a rolled up blanket or towel. Here, you are welcome to hold this pose for a rounds of breath, or about 30 seconds per side. Switch sides when ready.

Moving into our fourth pose, we are coming into a gentle twist. Twists can help to alleviate cramping. In this twist, we are letting both knees go to one side. When entering a twist, I really like to pick up my hips, and shift the just a little in the opposite direction that I am going to move my knees. A bolster (blanket, rolled towel, yoga block, stack of books) may be used to support the knees for the most gentle stretch, or the knees may come down to the ground (or anywhere in between by using smaller props). Feel free to hold this pose for 5-10 minutes per side, or as long as you like.

This twist is a slightly deeper twist, putting a little more pressure on the abdomen, and a little more stretch into the low back. I have a bolster under my knee here, but it could be done without. The sandbag beside me can also be added to my top knee, thigh, outer hip, to add a little extra weight for grounding and calming. I chose to support my head and neck here, and add a little cushion under me by folding up an additional blanket and placing on my mat. Holding here for 5-10 minutes per side, depending on comfort and time constraints.

This is quite possibly one favourite ever restorative poses. The additional weight on my low abdomen and legs here help to make it even more soothing. I have once again here supported my head and neck, although it may feel nice to be flat on the floor. I love the additional blanket under me, as my hips tend to be extra sensitive during my period, and sitting like this, with pressure on the back of my hips can be very uncomfortable after a few minutes. Feel free to stay here as long as your body wants to, ideally 5-15 minutes.
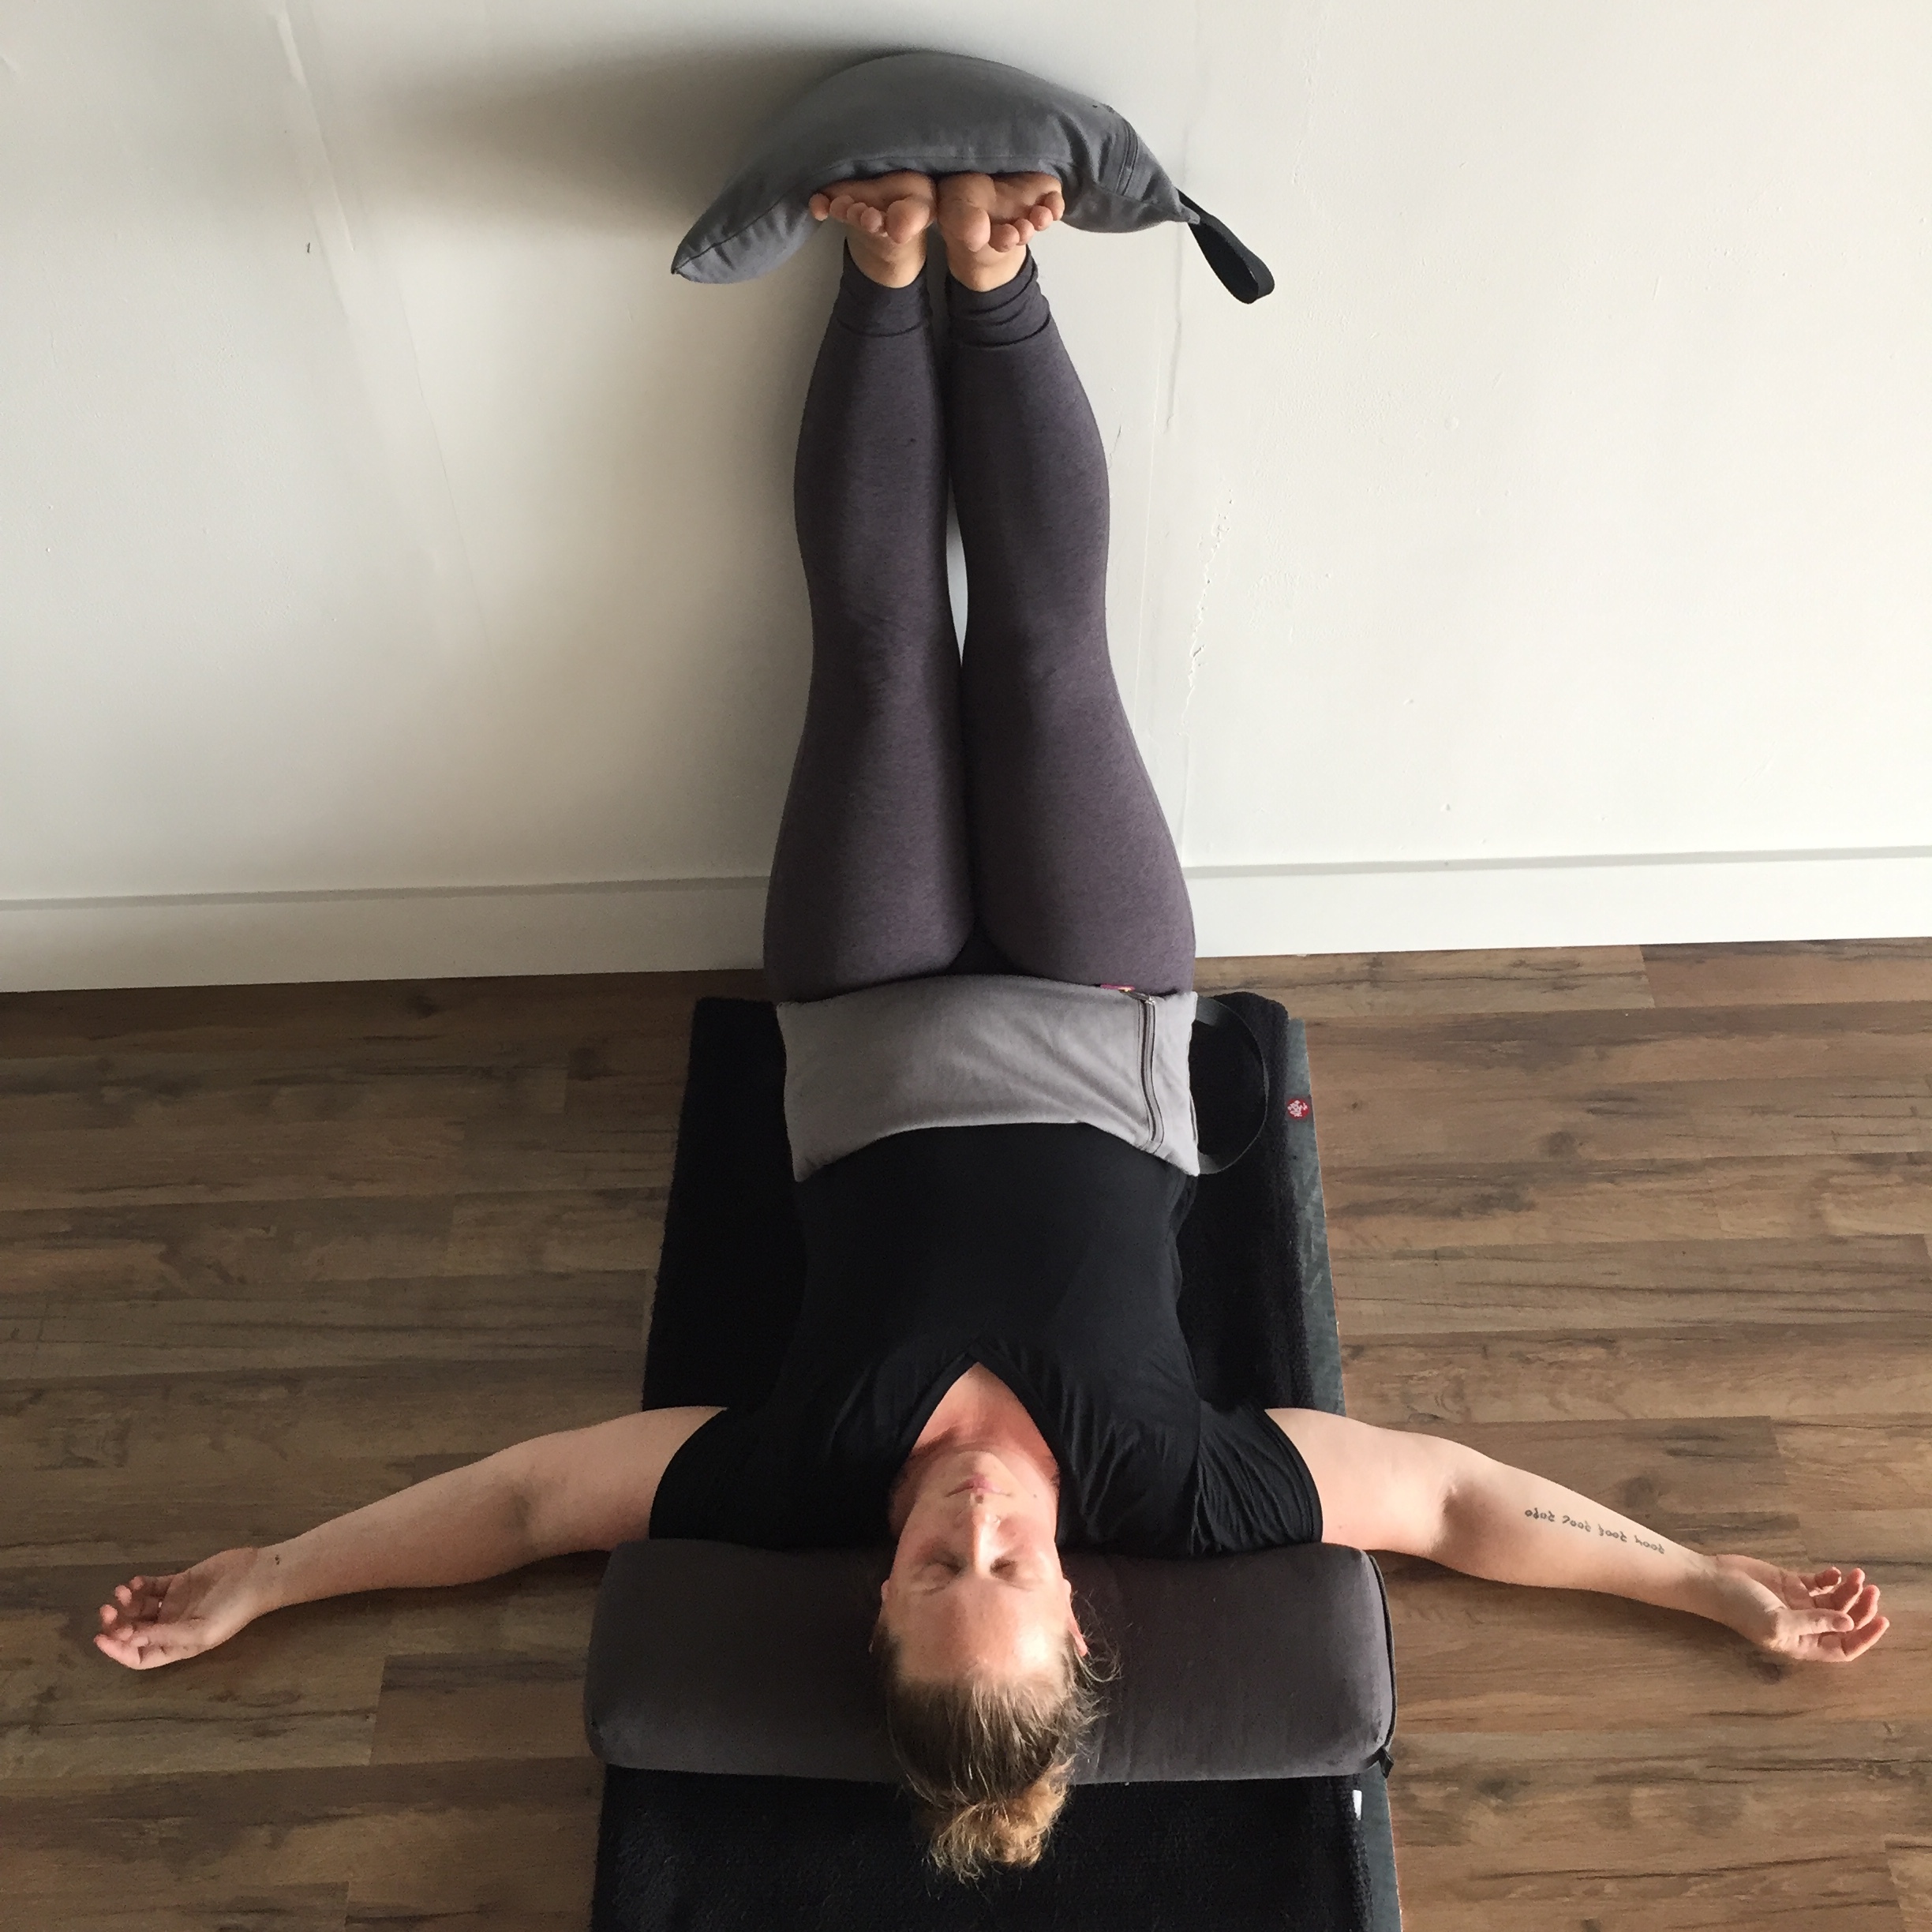
Legs up the wall is the only inversion that is indicated for menstruation. I chose this posture as my savasana (rest pose) but you could absolutely come into a more traditional rest pose following this if you would prefer (lying down on back or side with the support of props if desired). Here I added weights again to help me to further relax. A sandbag on my feet and hips. I have also added a folded blanket under my torso, and a support under my head. You can stay like this for 5-15 minutes, or as long as you desire!!
Hopefully you are able to carve some time out for yourself, and get to enjoy this practice. Remember, when you are doing this practice, pamper yourself, and be particular! Make sure that you are feeling completely supported in, and comfortable in the poses. Pretend that you are in the story The Princess and the Pea. Anything that feels off when you are setting up is likely to be amplified while you maintain the pose.
